HOW TO BUILD A FERRARI ENGINE
How To Build A Ferrari Engine
*FEATURE/by Wyld S. Stafmen * * Photos/Karl Ludvigsen *
Sports Car Graphic proudly presents this great series of instructions and photographs designed to aid the enthusiastic home handyman in building high-power V-12 engines in his own garage. Begin with Step 1, below. Follow instructions carefully......send us a photograph of your first completed engine.....and we'll send you our personal congratulations.
STEP 1.
First you install a complete light-alloy foundry for casting the aluminum cylinder blocks and heads, so you won't have to buy these from one of your major competitors. You'll want electrically heated ovens and a modern processing line, with permanent molds for the complex head castings. Also hire some skilled foundry-men to build up sand cores for your experimental V-12 cylinder blocks.
STEP 2.
Once you settle on a design that will be flexible enough to suit several different cars, you can install modern machine tools to replace the old-style method of piece-by-piece manufacture. For example, you can drill all the main cylinder block stud holes at the same time in a massive multi-drill machine. If you desire to emulate Ferrari, you might designate your blocks as being for the "330/GTC" or "365/GT 2+2."
STEP 3.
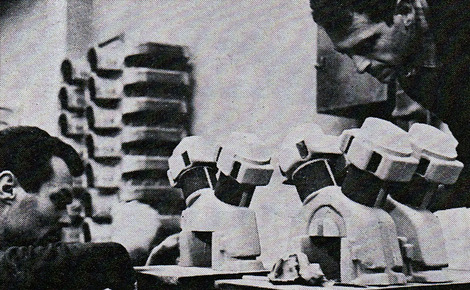
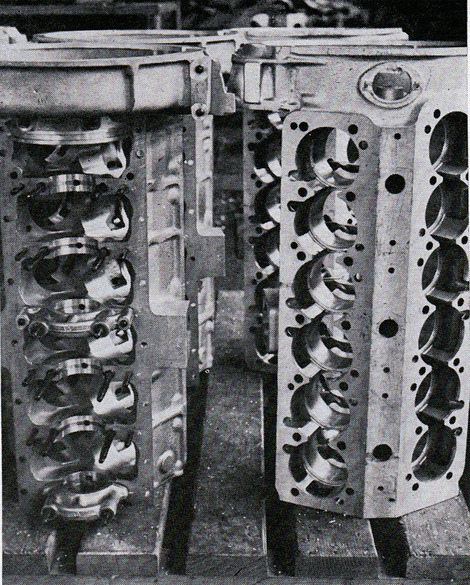
You'll want an immaculate tile floor for your garage, and some wooded pallets on which to carry around the near-finished aluminum cylinder blocks. Don't forget to use four-bolt main bearing caps for maximum stiffness, and lots of machining around the bores for the wet steel cylinder liners. These blocks could be for a "275/GTB4," and if anybody asks what the number stands for, you could say it's the size, in cubic centimeters of a single one of the 12 cylinders.
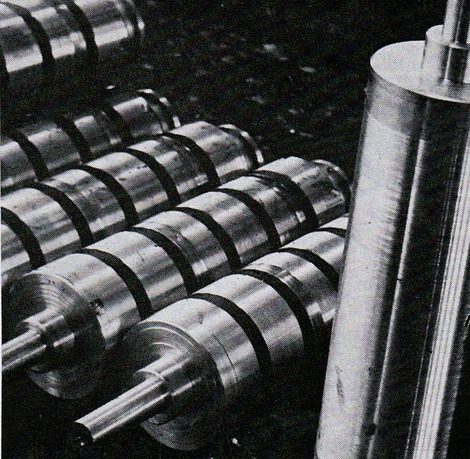
STEP 4.
Next lay in a good stock of tungsten carbide bits, because you'll have a lot of machine work to do on the crankshafts. As Bugatti once did and Ferrari still does today, you'll have to set up lathes to machine the crankshafts from solid steel billets. The first steps are to clean up the surface, and then to cut the grooves for the seven main-bearing journals.
STEP 5.
Your men will appreciate a few labor-saving devices so they won't have to lift the crankshafts themselves. And a helpful hint on getting a lathe that can handel this kind of work. One developed in Germany to manufacture 90 millimeter cannon shells that should be just right. See if can't line one up.
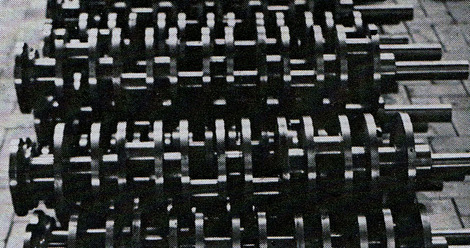
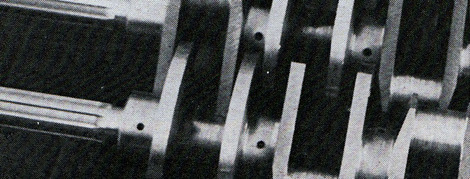
STEP 6.
After the main bearings, you next cut off pounds and pounds of steel to get down to the connecting rod bearings. You might be tempted to think it would be more economical to start with forging, shaped closer to the final article, but a study would show you (as it did Ferrari) that so much machining would be small.
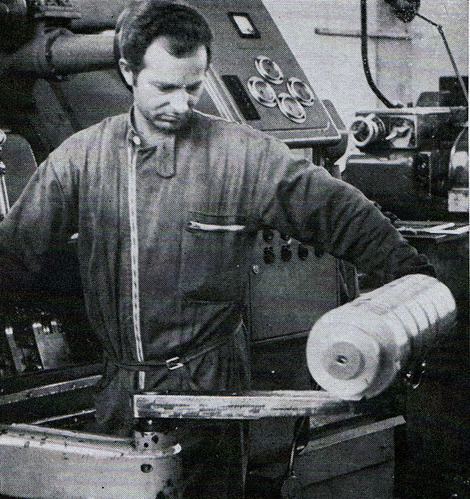
STEP 7.
Final touches on the crankshaft should include the shaving off of the webs to form counterweights, the drilling of oil galleries, and the splining of the end of the shaft that drives the front accessories. Next you should send the shafts to your heat-treating department, and afterwards grind them to the final finish. (Maybe you should have started with at least a two-car garage.)
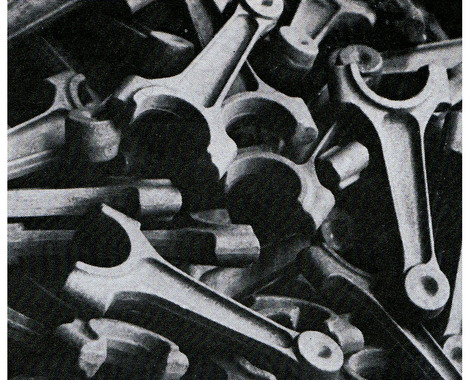
STEP 8.
One place you will want to use forgings will be for the steel connecting rods. Like Ferrari, you may not have room for your own forging operation, and it may be easiest to buy these outside. There's still a lot of machining to do before these will be ready to use, of course.
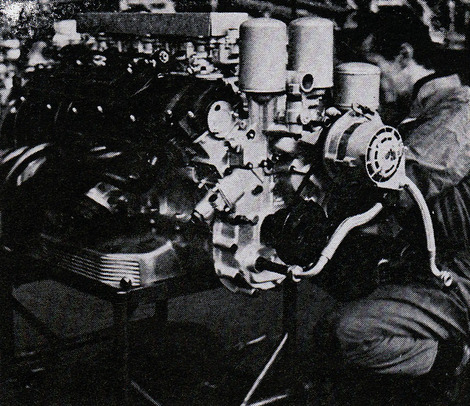
STEP 9.
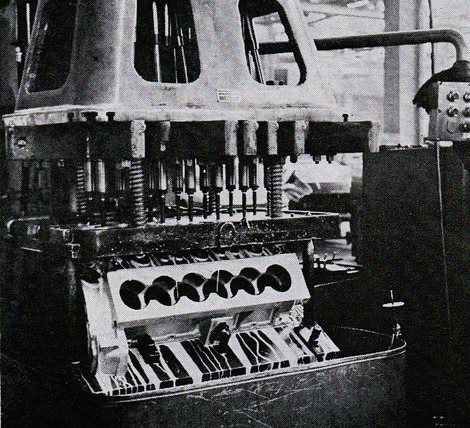
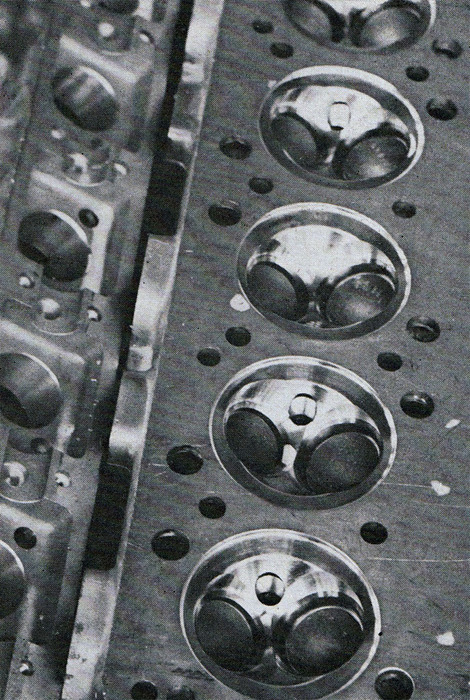
There's so much to be done on thr cylinder heads, especially on the twin-cam heads for your "275/GTB4," that we don't know where to start. Perhaps you'd better write us for full details. In general, the combustion chambers have to be fully machined, with deep circular cuts around the valve seats to prevent valve shrouding. You'll need a skilled man with a flex-shaft grinder to smooth away all the sharp edges in the chamber - without damaging the seat inserts.
STEP 10.
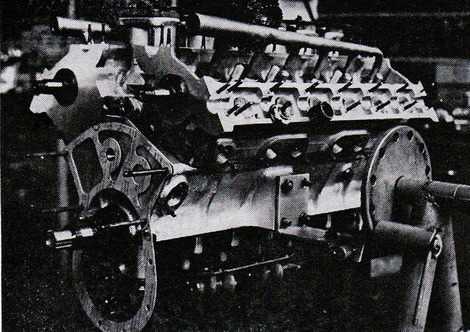
On individual stands, rolling along tracks in the floor, you can start putting your engines together. For the dry-sump "275/GTB4" model, you'll need twin oil scavenging pumps mounted to the bottom of the main bearing caps. During assembly, it's wise to have some knurled-handled plugs to screw into the spark plug holes to prepare to prevent dirt and other contaminants from entering the cylinders.
STEP 11.
Your engines can come out looking just as magnificent as the ones Ferrari builds. All you need is rigid quality control for the parts you buy outside, plus a dedicated corps of workers who don't mind working under perhaps the toughest discipline in the entire automobile industry. Train them to take pride in their work at your own apprentice school down the street, where they can learn by taking apart your old Grand Prix engines.
STEP 12.
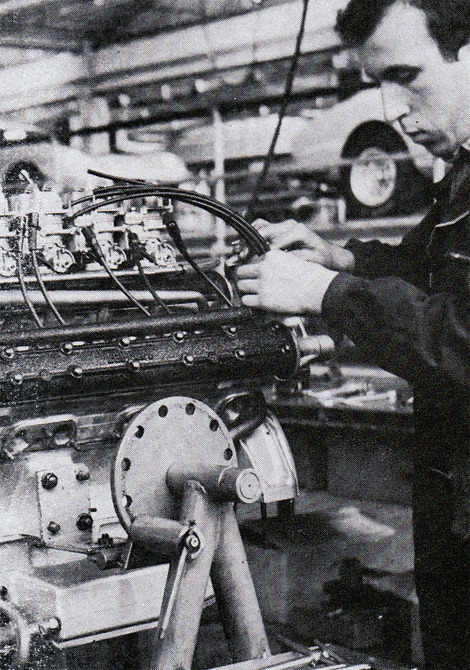
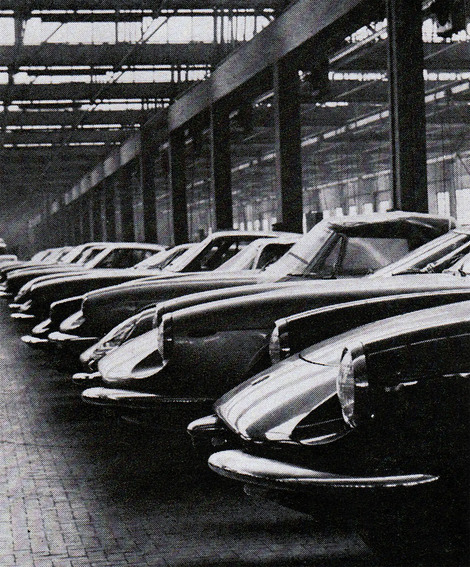
One of the last steps after you wheel a "330/GTC" engine off the line is to bolt on the tubular-steel exhaust manifolds. Then you take it to one of your dynamometer cells and operate it by electric power for two hours before you start it up under its own power. Next you run it in at varying speeds, stop to make a full-power test run. Now it's ready to go into a car.
STEP 13.
In case you're interested in finding a home for your engines, there's a bodybuilder called "Pininfarina" who comes highly recommended. Once you work out a deal with him, he'll ship you finished bodies on your own frame design, all painted and ready for you to hook on the suspension and drive train. He'll even provide a crew of men to work in your plant to touch up the cars after they come off the line. But we understand Pininfarina already has a pretty good deal going with Ferrari.........
A Tour of the Ferrari F430 factory - pardon my french
This ones in english
Another tour - they only get better
Posted 03/03/09 @ 08:47 PM | Tags: How to build a Ferrari engine, Sports Car Graphic November 1968, Ferrari, Pininfarina, Ferrari factory tours, Sports Car Graphic magazine